
Introduction
Screenshots are very beneficial; they allow users to capture whatever is happening on their screens in a picture. It can be used for various reasons:
- Share a Chat
- Report an Error
- Create a Tutorial
Are you the owner of a Mac laptop and in search of ways to take screenshots on Mac? You have arrived at the perfect spot.
This article will explain all the ways how to take screenshots on Mac. So let’s start without any further delay!
How to Screenshot on Mac?
Mac users can capture their screens by using the shortcut methods of pressing the specific keys. There are different commands for different tasks like:
- Screenshot the Touch Bar
- screenshot of your Entire Mac Screen
- Screenshot the Precise Area of Screen
- Screenshot of a Specific Mac Window
- Screenshot app for Screenshot Options
Mac Screenshot Shortcuts
Mac laptops/computers do not have a particular button for taking screenshots like other laptops. There are shortcuts and commands for this purpose.
Users need to press and hold the keys together to command the laptop such as:
| Commands | Purpose |
| Shift + Command + 3 | Press and hold these keys to capture your whole Mac screen |
| Shift + Command + 4 | Press and hold these keys to screenshot a portion of your screen |
| Shift + Command + 4 then press Space | Press and hold these keys to take a screenshot of a specified Mac window |
| Shift + Command + 5 | The screenshot app will be opened for more options relating to screenshots by pressing and holding these keys |
| Shift + Command + 6 | Press and hold these keys to snap the Touch Bar of Mac |
Screenshot Menu on Mac
On the latest Mac versions of the laptop, the screenshot menu appears by pressing and holding Shift + Command + 5 keys.
The screenshot menu on Mac has numerous options such as:

- Snap Whole Screen
- Record Whole Screen
- Snap Specified Portion
- Record Specified Portion
- Snap Selected Window(s)
- Where to Save the Screenshots (options)
Best Screenshot Apps for Mac
Third-party tools and apps can be utilized to take screenshots on Mac. Some of the best apps are listed below:
CleanShot X
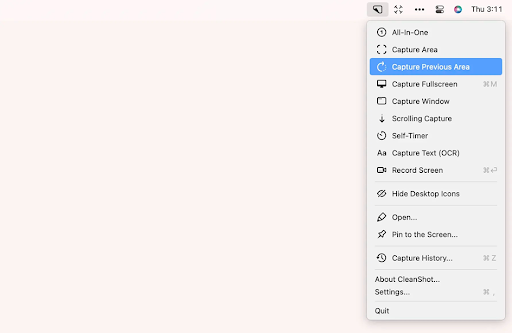
CleanShotX is a multi-purpose app. It can be used for taking screenshots and as well as recording screens. The app comes with 10GB of storage and many more exciting features
Dropshare
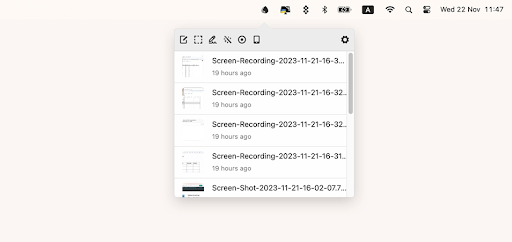
Dropshare is used for screen recording and capturing screenshots. The app allows users to add voice over the screen recordings. Users can create a password on recordings and screenshots to protect their privacy.
Capto
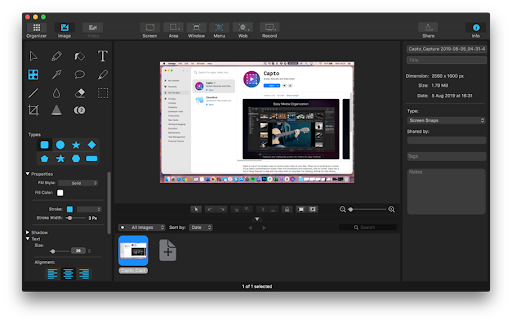
Capto allows Mac users to capture the screen via screenshots or recordings. It has a voice-over feature and built-in editor for convenience.
Xnapper
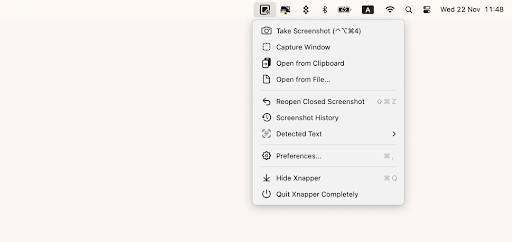
Xnapper is an amazing tool for taking screenshots or for screen recordings. Users can edit the screenshots by changing the background, etc.
FAQs – How to screenshot on Mac
Here are the frequently asked questions (FAQs) about How to screenshot on Mac:
Q1. How do I capture a screenshot?
Ans. Android users can take screenshots by pressing together “Power” and “Volume down” keys.
Q2. How to change where screenshots are saved on Mac?
Ans. Screenshots location can be changed from the screenshot menu of Mac. Here is the process:
1. Screenshot app will launch by pressing Command + Shift + 5
2. Navigate to “Options”
3. Select your desired location
Q3. How to send a screenshot on Mac?
Ans. Screenshots can be shared by just right-clicking on the screenshot via Share option.
Q4. How to see screenshots on Mac (select all screenshots to view)?
Ans. Screenshots are usually by default saved in the Document folder or the desktop of the laptop.
Q5. How to screenshot on Mac with the keyboard?
Ans. There are various shortcuts such as:
- Press and hold Shift + Command + 4 to snap a part of your screen
- Press and hold Shift + Command + 4 to capture a specific window
- Press and hold Shift + Command + 3 to capture the entire Mac screen
Q6. How to screenshot on Mac without a keyboard?
Ans. Mac Screenshot App can be used to capture screens without a keyboard:
1. Navigate to the Applications folder
2. Click on the Utilities option
3. Here you will find the Screenshot App
Q7. How to screenshot a full page on Mac?
Ans. A screenshot of a full page of a Mac screen can be taken by just pressing and holding Shift + Command + 3.
Q8. Why can’t I screenshot on my Mac?
Ans. Mac owners can activate the screenshot feature:
1. Navigate to the Apple menu
2. Go to the “System Settings”
3. Click on the “Keyboard” option and then “Keyboard Shortcuts”
4. Press the “Screenshot” button and activate the feature
Q9. How to paste a screenshot on a Mac?
Ans. Users can easily copy and paste the screenshot by pressing the “Control” key while capturing a screenshot.
The screenshot will copy to the clipboard, now press Command + V on wherever you want to paste it.
Q10. How to disable screenshots on Mac?
Ans. If you want to disable the screenshot feature on Mac, then follow the steps:
1. Go to “System Preferences” on your Mac
2. Navigate to” Security & Privacy”
3. Click on the “Privacy” option
4. Go to the “Screen Recording” option to disable the feature
Q11. How to selectively screenshot on Mac?
Ans. Mac owners can snap a specific or selective area of the screen by pressing and holding together Command + Shift + 4 keys.
Conclusion
Screenshots are useful in many different ways for preserving a memory of a conversation or as evidence of a contract or promise.
Snapping a screen on a Mac laptop is possible in many different methods. Users can use third-party tools or the built-in Screenshot app of Mac.


