

Introduction
Screen Recording on Windows 11 can be achieved by numerous third-party tools/software. Computer users can use screen recording tools for numerous purposes and tasks such as:
- Saving Favorite Shows
- Recording Video Games
- Recording YouTube Videos
- Creating Video Presentations
- Saving Video Calls for Memories
- Saving Online Classes for Revision
We often see How-to detailed videos about various topics. The videos are made by recording screen and later creators voice over these videos to complete them.
This article will tell our readers about How to Record Screen in Windows 11 in multiple ways. So let us start!
How to Record Screen in Windows 11?
Screen Recording Tools are extremely beneficial. It is a perfect solution if you are planning to showcase your gaming skills or any other abilities like graphic designing or computer drawing.
The screen recording tools turn whatever is happening on your computer screen into a video. Users can later edit the video, add voice-over, music, etc. to it
There are multiple ways to record screens in Windows 11, this article will explain four of the following:
- Screen Record in Windows 11 Online
- Screen Record in Windows 11 with Descript
- Screen Record in Windows 11 with Snipping Tool
- Screen Record in Windows 11 with Xbox Game Bar
How to screen record on PC Online?
If you do not want to download any software and want to use online screen recording tools on your Windows 11 PC, then follow these steps:
- Screen Capture’s Website
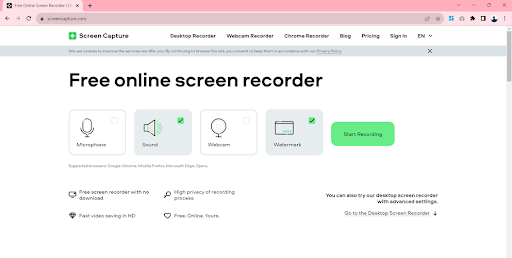
Open your web browser and navigate to the official website of Screen Capture by typing www.screencapture.com
- Start Recording
Press the green colored “Start Recording” button to initiate the recording process.
- Choose the Recording Area
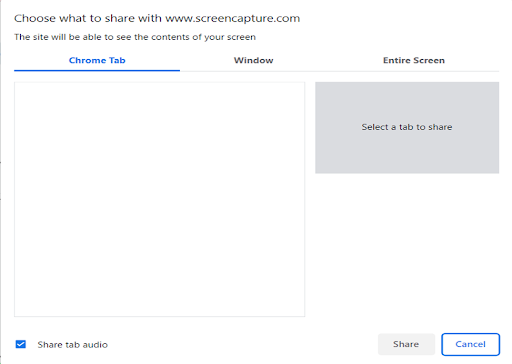
Now select the recording area according to your requirement from:
- Window
- Chrome tab
- Entire Screen
We are selecting the “Entire Screen” option in this demo.
- Share Your Screen
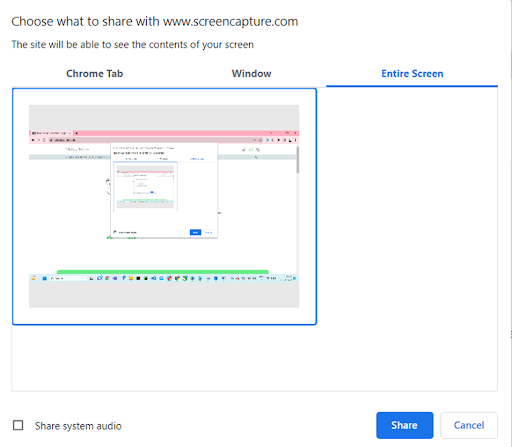
After selecting the area of the screen recording it will show the preview. Click on the “Share” button if you are pleased with the preview.
- Stop Recording
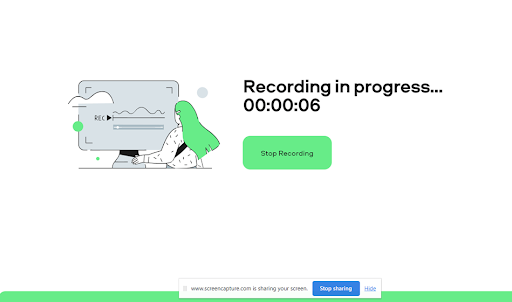
Once you are done with the recording process, press the “Stop Recording” option from the center of the platform.
- Download Recording
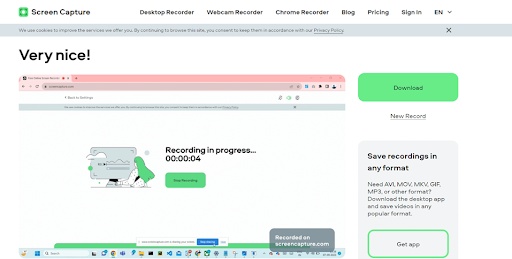
Navigate to the “Download” option on the right side of the Screen Capture website.
- Find the Recording File in Downloads
The recording will be downloaded in the default download file of the computer. Enjoy!
How to Record Your Screen Using Descript (for Advanced Editing Capabilities)?
People nowadays are more inclined towards software/tools that are all in one. Descript Video Recording Tool can help you do multiple tasks like:
- Record Screen
- Edit Video
- Add Music
Follow these steps to use this advanced video recording tool:
- Create an Account on Descript
Users need to create an account on the platform by selecting the “Sign up” option. They can choose from various plans such as:
- Free Plan
- Subscription Plan
- Sign Up on Descript Account
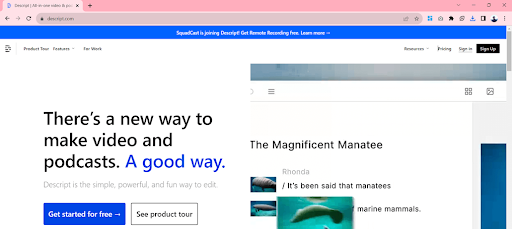
Navigate to Descript.com and press the “Sign in” button to sign in your account using the email you used to create an account
- Download the Descript App
Click on the “Download” button to start the downloading process. There are a variety of versions available such as:
- Microsoft Windows 10
- Mac High Sierra (10.13)
- Open the District App
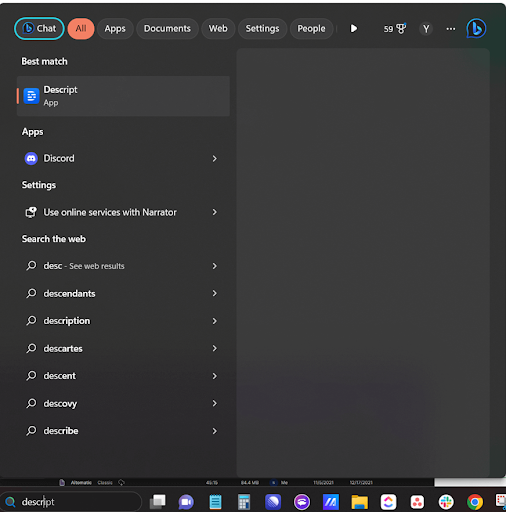
Open the app after the installation procedure is completed by searching it on the Search Bar of your PC.
- Create a New Project
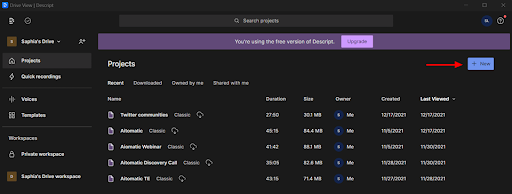
Press on the “New” button with a plus sign to start a new task
- Choose Video Project
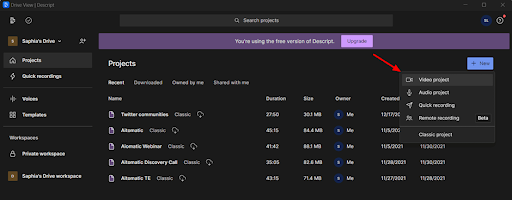
There will be multiple options like:
- Video Project
- Audio Project
- Quick Recording
- Remote Recording
We are selecting the “Video Project” option in this demonstration
- Start Recording
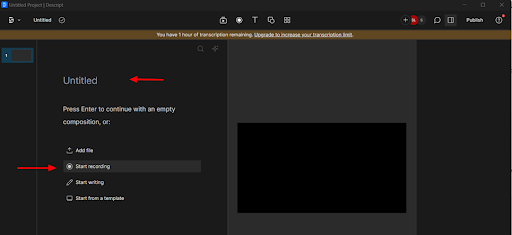
Generate a title for your video and click on the “Start Recording” option.
- Choose Your Settings
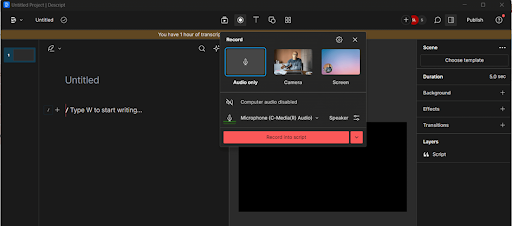
Choose the settings of the software according to your needs. You can select from:
- Screen Recording
- Camera Recording
- Microphone Audio
- Record Your Screen
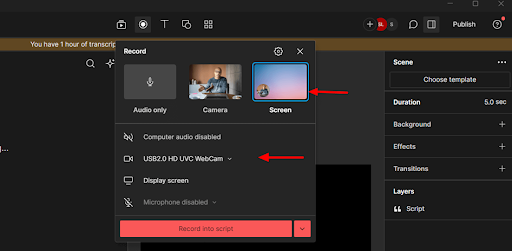
Press the “Record into Script” option to start the process. Once you are done with recording users can download the screen recording and share it on other social media platforms.
How to screen record with Windows 11 Snipping Tool?
There is an inbuilt recording tool in the Snipping Tool of Windows 11. The screen recording tool is compatible with working on 22621.1344 or higher versions of Windows 11.
Users can record screens by following the mentioned method:
- Check the OS Version of Windows 11
The first step is to check whether your PC is compatible with this way of screen recording or not.
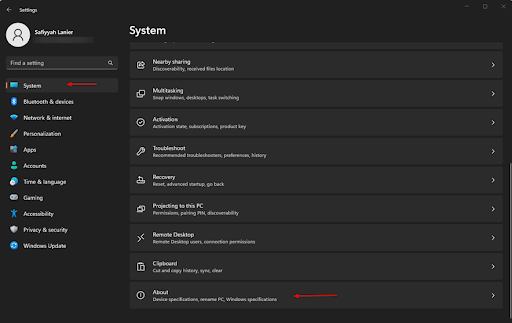
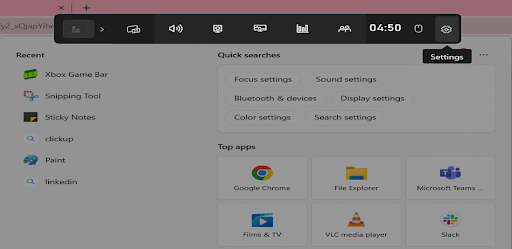
Click on the “Windows Start” button and navigate to the “Settings”
Press on the “System” option and check the version of your device in the “About”
- Search the Snipping Tool
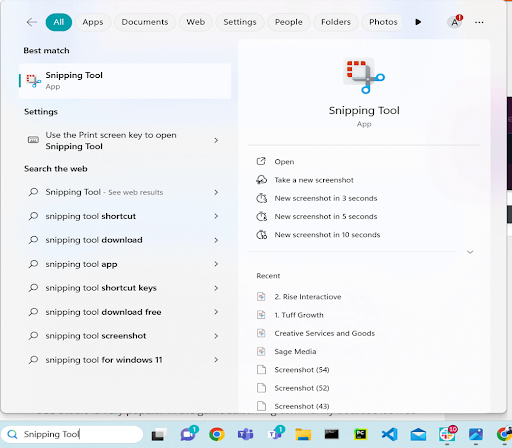
Search the “Snipping Tool” on the Windows search bar and open it.
- Start Recording
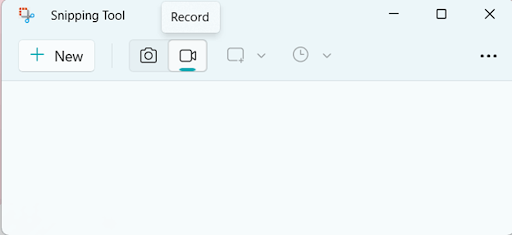
Initiate the recording process by pressing the video camera icon stating “Record”
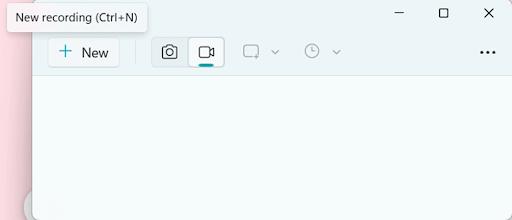
Press on the “New” button to start the new screen recording file.
- Select the Recording Area
Users can crop the area they want to come in screen recording by dragging the cursor away.
- Initiate the Recording Process
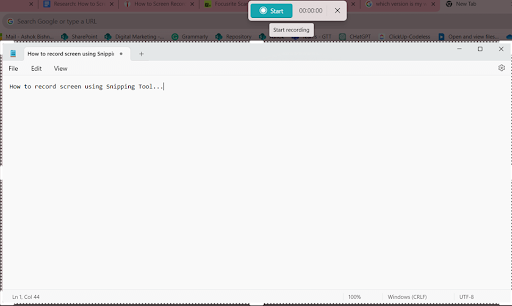
Start the recording process by pressing the “Start” button.
- Save the File
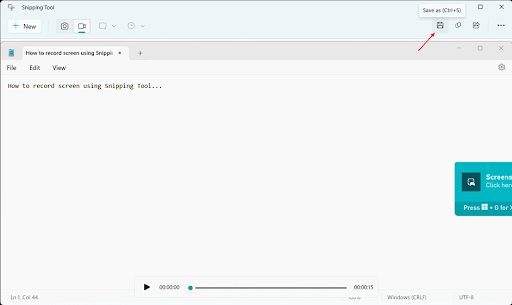
Download the recording file by clicking on the “Floppy Disc icon. It will give you two options:
- Save
- Save As
Press the “Start” option to initiate the recording of the area you cropped.
How to Screen Record in Windows with Xbox Game Bar?
Another epic way for screen recording is to use the Xbox Game Bar. It is available on various Windows such as:
- Windows 10
- Windows 11
Below is the complete process to use this method of screen recording:
- Open the Xbox Game Bar
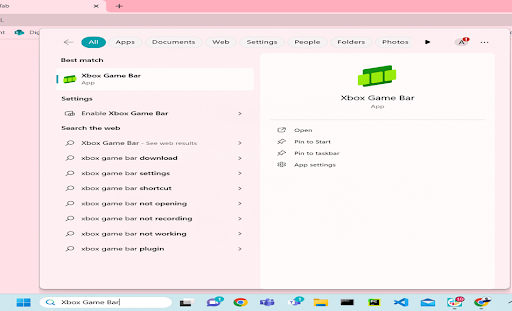
Users can reach the Xbox Game Bar in two ways:
- Pressing the Windows + G
- Searching it on the search bar
- Access the Recording Toolbar
The floating toolbar of Xbox Game Bar will appear on your screen. Users can go to the “Settings” option to set the recording according to the requirements.
- Start Capturing Screen

Press the “Capture” button on the toolbar to start screen recording.
- Access Your Screen Recordings
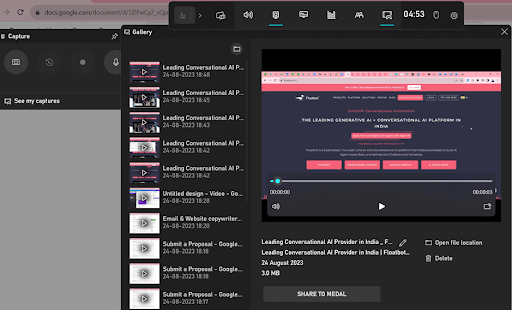
Users can press the “See my captures” option to view all the recordings. Window Gallery will appear consisting of all the recording files.
FAQs – How to Record Screen in Windows 11
Here are the frequently asked questions (FAQs) about how to Record Screen in Windows 11:
Q1: How to record my screen on Windows 11 without any software?
Ans. The best part is that Windows 11 comes with a built-in feature for recording your screen. Other ways include:
- Use Snipping Tool
- Use Xbox Game Bar
- Use Extension or App
Q2: How to record my screen on Samsung?
Ans. All you have to do is follow these steps:
- Navigate to “Settings”
- Go to “Screen Recorder” option
- Click on “Start”
- After recording is completed, click on “Stop”
Q3: How to record my whole screen on Windows 11?
Ans. Follow these steps:
- Press “Windows key+Alt+R” to start or stop the recording
- Press “Windows key+Alt+G” to record the last thirty seconds of your screen activity
- Press “Windows key+Alt+B” to turn on or off the HDR option
- Press “Windows key+Alt+PrtScn” to take a still screenshot of your screen
Q4: Is there any option in Windows 11 for recording my screen?
Ans. Yes, you can record your screen activity on Windows 11 using snipping tool for the generation of Mp4 videos.
Q5: How to record my whole screen and also audio on Windows?
Ans. You can avail these features utilizing “Xbox Game Bar”. All you have to do is tap “Windows Key+G” to initiate the Game Bar, then tap on the “Record” option and that’s it.
Conclusion
The screen recording feature is available on some versions of Windows 10 and 11. There are many other third party apps/tools to record the screen.
This article explained these methods in detail. We hope you found this piece of information helpful.


